

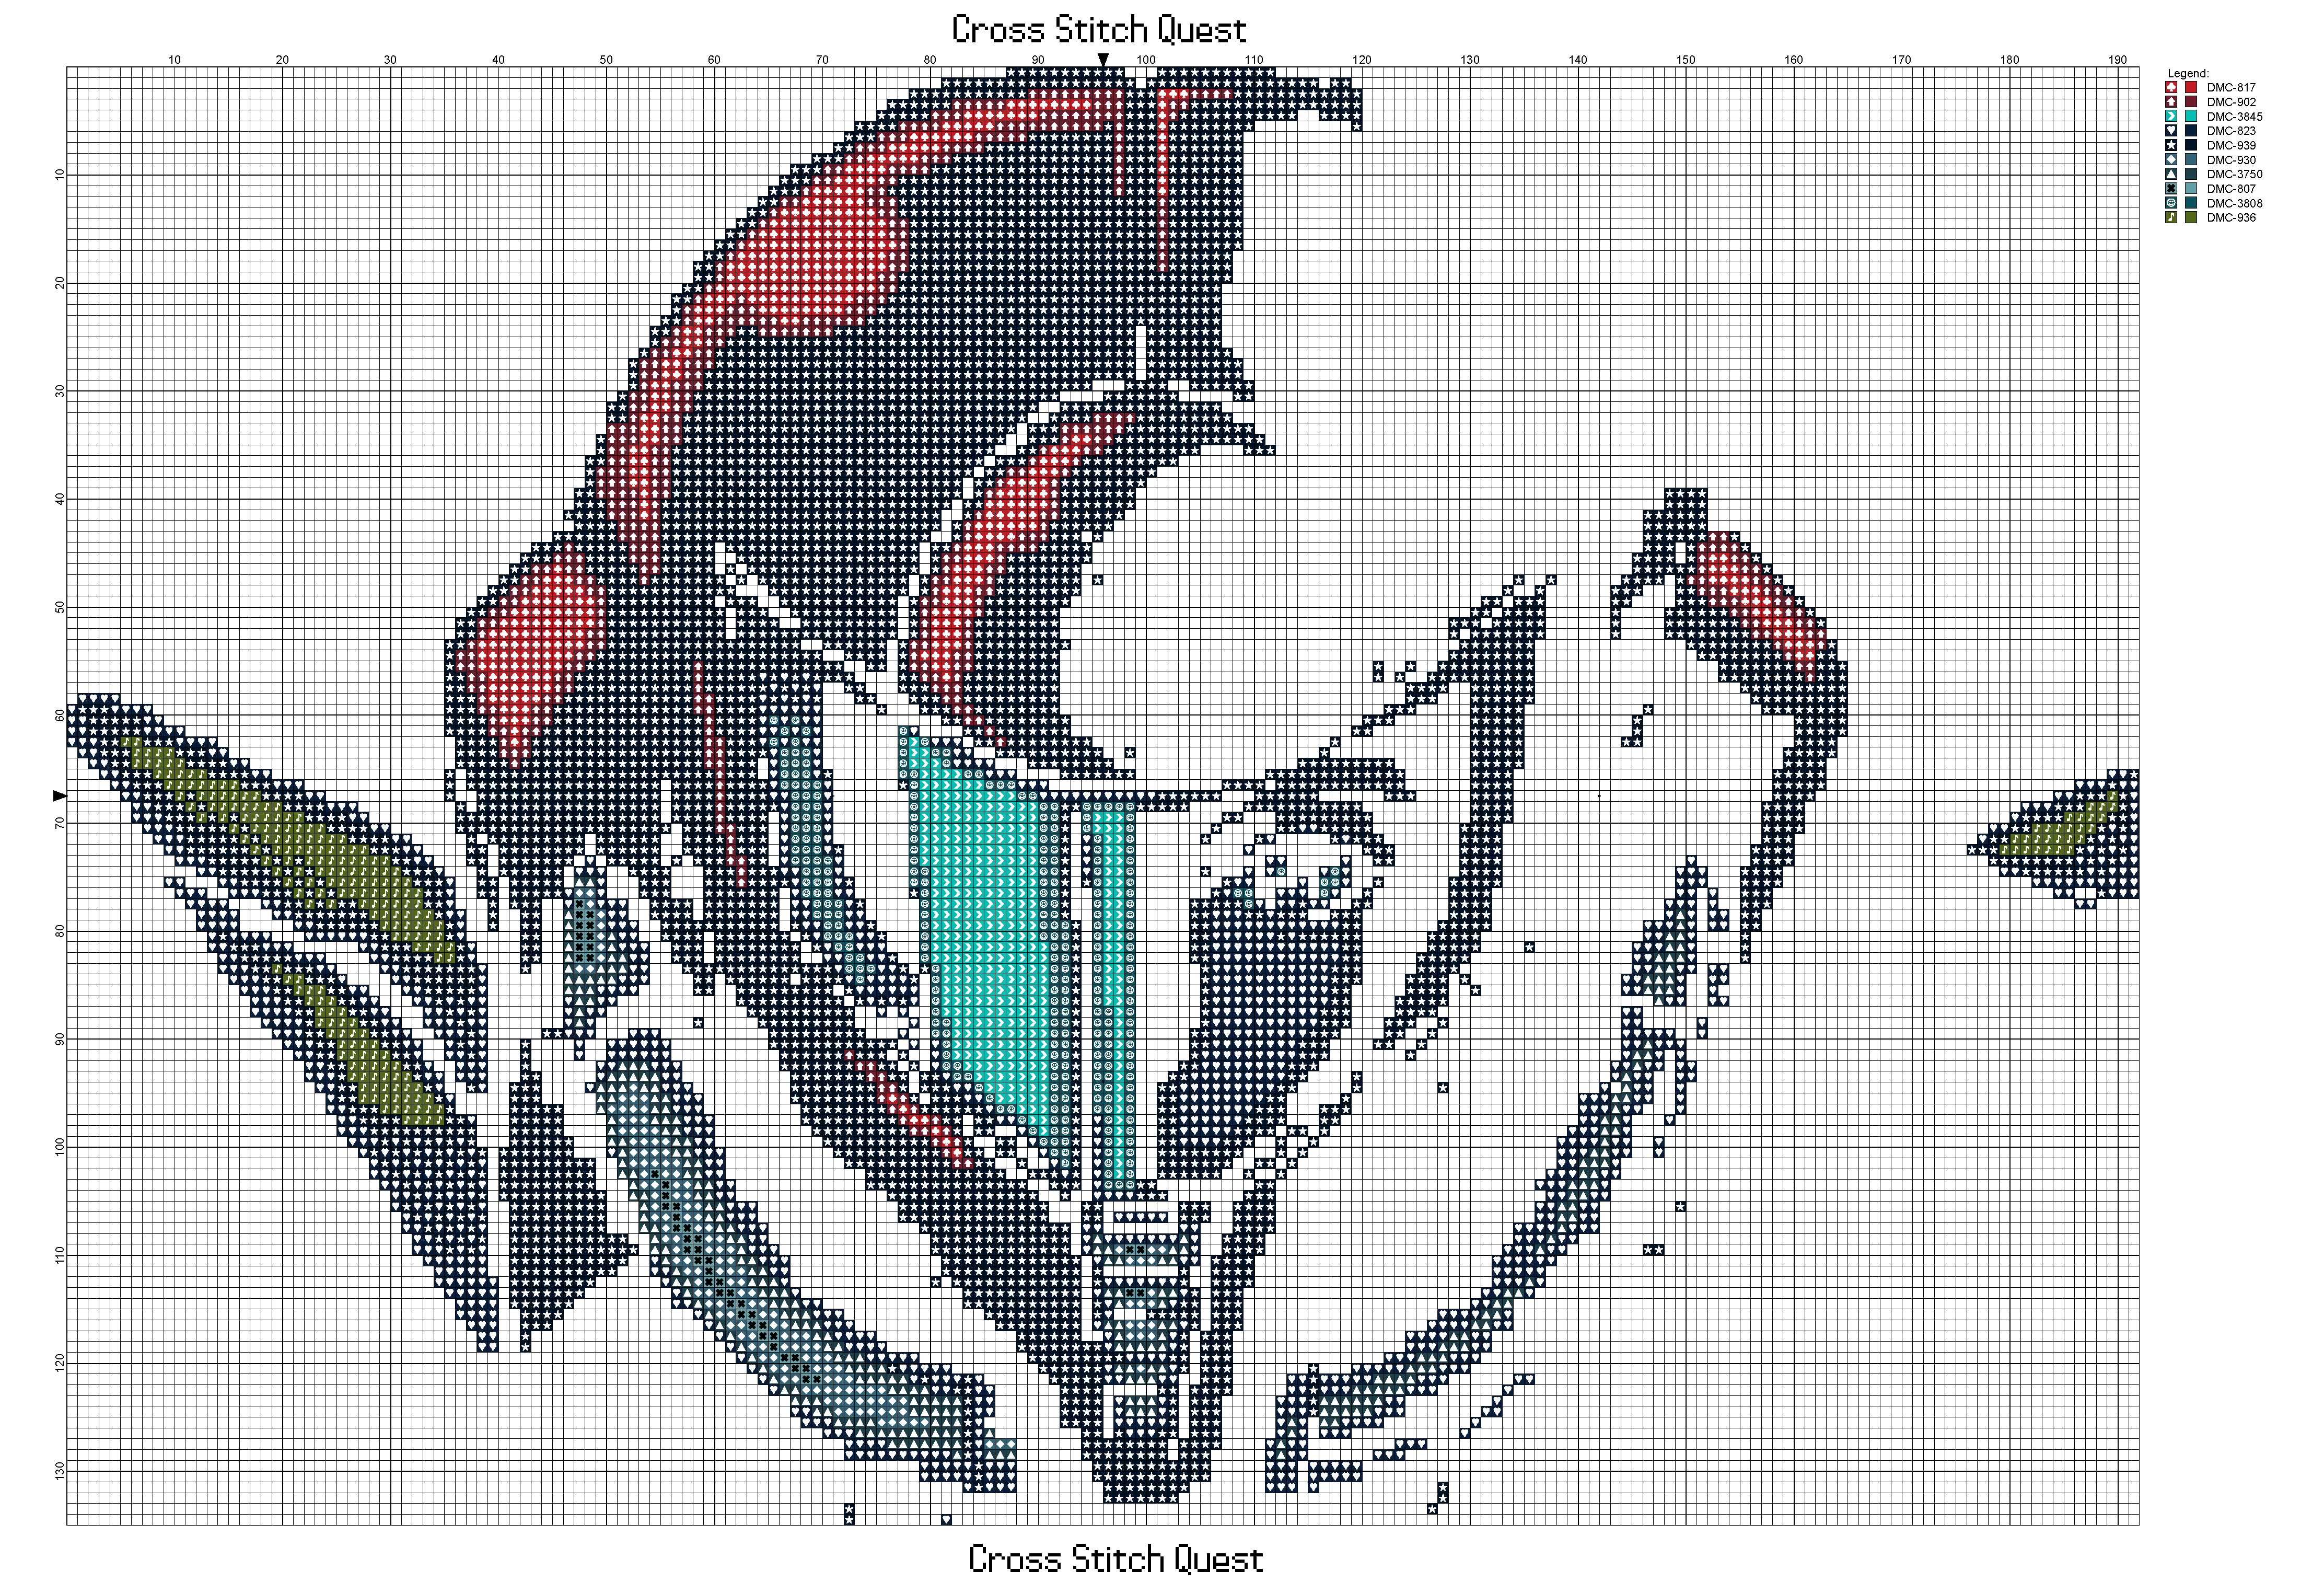
Cross stitch pattern of Samus from Super Metroid. Thanks to Bob Bobiam for the sprite. The Pattern is meant to be stitched on black aida. It’ll save you a whole lot of black stitches. Download the PDF here: Samus Helmet Pattern
Grid Size: 192W x 135H
Design Area: 13.71″ x 9.64″ (192 x 135 stitches)
Colors: 10
Today’s pattern was a request from my patron, NinjaGoemon. You can get a custom pattern too if you join my Patreon.
So let me rant a bit about flag labels. Yes, I know no one cares, but I know that one day my rage may subside and I need to document this somewhere. Flag labels are the epitome of good on paper but bad in practice. They’re little transparent labels that go around a sample and leave a part that sticks out on the side like a flag. Most of it is clear so that it can add more information without obscuring the original label. Nice huh? Wrong! These little suckers are the worst! So, we have 2 inch samples and 3 inch samples. You don’t have much choice with the 2 inch ones since the cap takes up some space and there’s often a bit at the bottom where it’s tapered so you just have to slap it on wherever it fits. Oh, but the 3 inch ones, those 3 inch ones…
Originally, I preferred to stick flag labels up high on the three inch tubes. This made placing samples in their box easy since the flag flew above the top of the one inch dividers. Nice easy little rows of flat flags, easy to scan and put in place, but unfortunately not easy to take out. If I made a mistake or just had to take one out for any reason, a full box of high staff flags would mean that one flag would get caught under the cap of the one next to it and then that one’s flag would catch on the next and the whole row would come up at once! But, then what’s the alternative? The low staff. If you put a flag label low on the sample then wrap it around like a scarf, you can get it to sit snugly underneath the top of the dividers so the dividers hold it in place. This means that you’re less likely to pull a whole row out, but it does take a little extra time putting them in. There’s also the downside that the label is now curved and the barcode isn’t as easy to scan, but I consider that an okay trade off. I have now converted to a low staff flag labeler.
Unfortunately, it’s never that easy. We got feedback from the lab about the labels. Turns out that -70 temperatures don’t play well with adhesives and the high staff labels would not only mess up rows when removed from a box, they would yank the label up and cover the cap so it couldn’t screw off. And the low staff flag labels would make the bottoms of the samples too big to fit into the lab equipment that has slightly smaller openings than the run boxes.
From now on, we’re all going to have to half staff it, and it’s going to be awful, because we get all the drawbacks and none of the benefits of the extremes. I’m not saying that I wouldn’t have taken this job if I had known before hand how much of my time would be wasted on fiddly little stickers, but I might have hesitated a little.
